The Vito Iacopelli Pizza Dough is one of the most talked-about pizza dough methods today.
I got curious about it after seeing how many home cooks were baking real Neapolitan-style pizza in their own kitchens. That caught my attention right away.
Vito Iacopelli is an Italian master pizzaiolo and YouTube creator who teaches simple pizza skills online. His dough method has helped millions get soft, airy, pizzeria-style crust at home.
What pulled me in was his poolish starter, double fermentation, and true Neapolitan technique.
When I tried his process, the dough felt smooth, light, and easy to stretch. The crust baked up soft inside with a gentle crunch outside. It also felt lighter to eat.
In this post, I cover his exact dough method, key tips, and fixes for common problems. You’ll also see why this Vito Iacopelli Pizza Dough Recipe has such great flavor, texture, and is easy to digest.

What Makes Vito Dough Different From Others
- Poolish Pre-Ferment: Vito mixes flour, water, yeast, and a touch of honey 16 to 24 hours early. This builds flavor and helps the dough rise better.
- Double Fermentation Process: The dough rests twice. First, the poolish sits overnight. Then the dough balls rest again. This creates more air and better texture.
- Authentic Neapolitan Technique: Vito follows old Italian methods. He stretches by hand and never uses a rolling pin. This keeps the air inside.
- Temperature Control Formula: He uses the 1727 rule to get the right dough warmth. This makes the dough rise just right every time.
- High Hydration Levels: His recipe uses more water than most. This gives you a soft, airy crust with lots of bubbles inside.
Pizza Flour Vito Iacopelli Uses
Vito recommends using 00 flour for authentic results. This is called chef’s flour or pizzeria flour in Italy. The 00 refers to how finely the wheat is ground.
Fine milling creates silky smooth dough that stretches beautifully. The gluten strength in 00 flour is perfect for pizza. It holds gas bubbles but stays elastic.
When you stretch the dough, it does not tear easily. The flour creates that signature thin crust with puffy edges.
Hydration Level Explained
- Typical Hydration Range: Most recipes use 60–65% water to flour ratio. This percentage creates the perfect balance for home pizza making.
- Air Bubble Formation: Higher hydration means more steam during baking. Steam creates those beautiful large air pockets in the crust everyone loves.
- Dough Softness Factor: More water makes softer, easier-to-chew pizza. The inside becomes light and airy rather than dense and tough.
- Workability Level: Lower hydration dough is easier to handle for beginners. Higher hydration requires more practice but gives better results.
- Oven Spring Effect: Well-hydrated dough puffs up dramatically in hot ovens. The crust rises high and creates that classic Neapolitan look.
The 1727 Dough Rule Vito talks about
- Flour Temperature: Measure the warmth of your flour before mixing. Use a thermometer. Room temperature flour works best, around 68 to 72 degrees.
- Room Temperature: Check how warm your kitchen is before you start. Warmer rooms make dough rise faster, while cooler rooms slow it down and may require warmer water.
- Water Temperature: Adjust your water warmth based on the flour and room temperature. Use this formula: 55 minus room temp minus flour temp equals water temp.
- Target Dough Temperature: After mixing, your dough should reach about 75 to 78 degrees. This is the ideal range for proper yeast activity.
- Why Temperature Control Matters: If temperatures are off, yeast can work too fast or too slow. Keeping the right warmth helps the dough rise evenly and builds better flavor.
Vito Iacopelli Pizza Dough Ingredients
- 00 Flour (4¼ cups or 600g): This is the base of your dough. The fine Italian flour creates a smooth, elastic texture. You can use all-purpose flour, but the crust won’t be as soft. Bread flour works too, but it makes a chewier pizza.
- Water (2 cups or 400ml total, divided): Water wakes up the yeast and brings everything together. The recipe splits this into two parts. First, 100ml goes into the poolish. The rest goes into the main dough. Use cold water for better control. Tap water works fine unless it tastes bad.
- Dry Yeast (½ teaspoon or 2g): This makes the dough rise and creates air bubbles. A tiny amount goes a long way. You can use fresh yeast instead. Use about 6 grams of fresh yeast to replace dry.
- Honey (¼ teaspoon or 1–2g): This feeds the yeast and helps it work faster. It also adds a hint of sweetness. You can skip this or use sugar instead. The amount is so small it barely affects taste.
- Salt (2 teaspoons or 10g): Salt brings out the flavor in every bite. It also controls how fast the yeast works. Don’t skip this. The dough will taste flat without it. Sea salt or kosher salt both work fine.
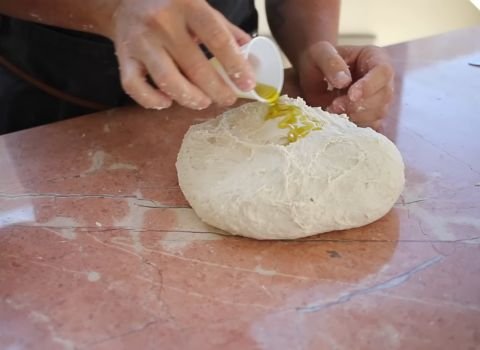
- Olive Oil (1 tablespoon or 15ml): This helps when you shape the dough balls. It stops them from sticking to your hands. Extra virgin olive oil tastes best. Any cooking oil works in a pinch.
- Flour for Dusting (about ⅓ cup or 50g): You’ll need this when stretching the dough. Mix regular flour with semolina if you have it. This stops the dough from sticking to the counter.
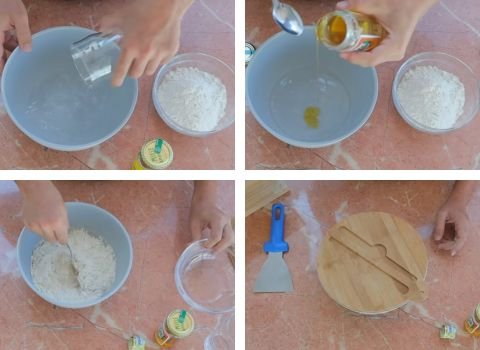
Kitchen Equipment
- Mixing bowl — large, deep
- Digital scale — precise weight
- Dough scraper — easy handling
- Proofing containers — airtight
- Stand mixer — optional help
- Thermometer — temp control
- Pizza peel — oven transfer
- Pizza stone/steel — heat retention
How to Make Vito Iacopelli Pizza Dough
Step 1 | Make the Poolish
Get a small bowl. Put in 100 grams of cold water. Add 2 grams of dry yeast. Stir it with your finger until the yeast melts. Add a tiny drizzle of honey (about 1–2 grams). Mix it again.
Now add 100 grams of 00 flour. Mix with a spoon for a few minutes until it is all combined. It will look like a thick paste. Cover the bowl with plastic wrap.
Let it sit on the counter for one hour. Then put it in the fridge. Let it rest there for 16 to 24 hours.
Step 2 | Prepare the Final Dough
Take the poolish out of the fridge. In a large mixing bowl, pour in the cold water. Add the salt and stir until fully dissolved. This protects the yeast.
Add all of the poolish into the salted water. Use a spoon or your hands to break it up and mix well. The mixture will look cloudy and thick.
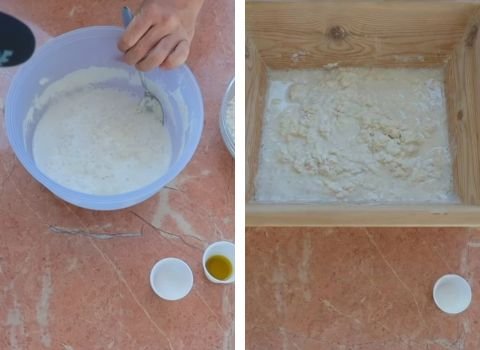
Step 3 | Add Flour and Mix
Add all the flour to the bowl at once. Mix with a wooden spoon first. When it starts to come together, switch to your hands.
Knead gently inside the bowl until no dry flour is visible. The dough will feel sticky and rough. This is normal.
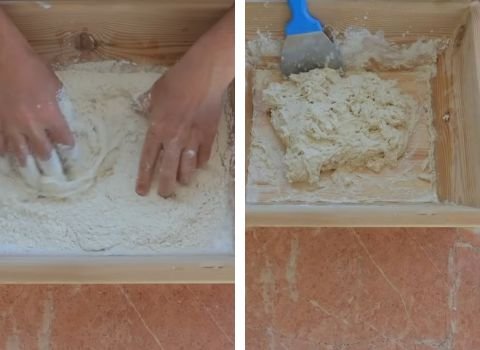
Step 4 | Knead the Dough
Turn the dough out onto a clean counter. Do not add flour yet. Press the dough flat with your palms. Fold it over itself, turn it, and repeat. Keep doing this for about 5 minutes.
The dough will slowly become smoother and less sticky. If it sticks badly, add just a tiny sprinkle of flour.
Step 5 | Rest the Dough
Cover the dough with a bowl or damp towel. Let it rest for 15 minutes at room temperature. This helps the gluten relax and makes the dough easier to shape.
Step 6 | Shape the Dough Ball
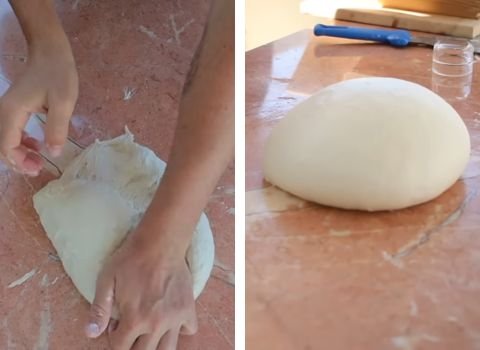
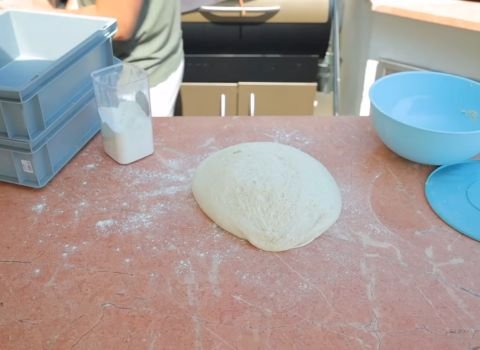
Lightly oil your hands with olive oil. Pick up the dough and pull the edges underneath while rotating it.
Keep doing this until you form a smooth, tight ball. The top should look smooth and the bottom should be sealed.
Step 7 | Divide and Ball the Dough
Cut the dough into equal pieces. For 12-inch pizzas, use 280 grams per ball. Shape each piece into a tight ball using the same pulling and rotating motion.
Create surface tension by gently dragging the dough against the counter.

Step 8 | Store the Dough Balls
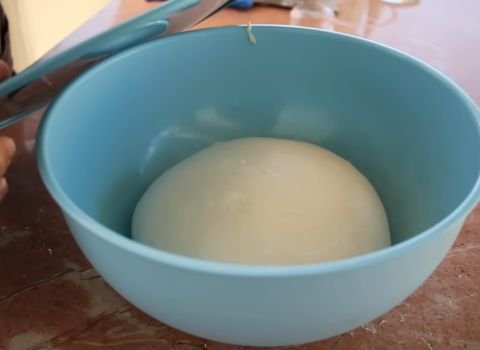
Lightly oil your containers. Place each dough ball inside. Brush a thin layer of olive oil over the top of each ball. Cover with lids or plastic wrap to prevent drying.
Step 9 | Final Rise
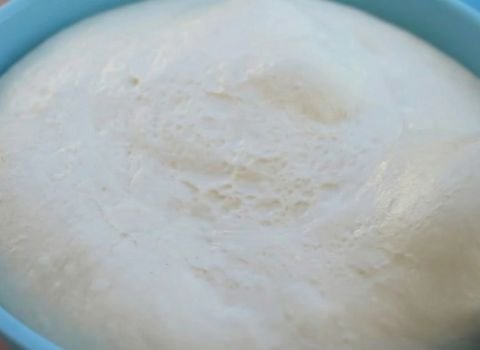
Let the dough balls rest at room temperature for 1–2 hours. They should nearly double in size. When ready, the dough will feel soft, airy, and elastic. Now your pizza dough is ready to stretch, top, and bake.
Chef Note + Tips
- Use Cold Water in Final Dough: Cold water slows fermentation and improves flavor. Warm water makes the dough rise too fast and results in bland taste.
- Watch Poolish Timing Carefully: For best results, ferment the poolish for 16–20 hours. After 24 hours, it becomes too sour and loses strength.
- Room Temperature Matters Hugely: Warm kitchens speed up fermentation, while cool rooms slow it down. Always adjust resting time based on your room temperature.
- Gentle Handling Produces Airier Crust: Handle dough gently during shaping and stretching. Rough handling pushes out air bubbles and reduces oven spring.
- Trust the Sticky Dough: Wet, sticky dough is scary at first. Trust the process. Do not add too much flour while mixing. The stickiness creates the airy crust.
Ways to Use This Dough
- Classic Margherita Pizza: Top with San Marzano tomato sauce, fresh mozzarella, and basil leaves. Drizzle olive oil before baking for authentic Italian flavor every time.
- White Pizza (Pizza Bianca): Skip tomato sauce completely. Use ricotta, mozzarella, garlic, and olive oil instead. Add fresh herbs after baking for a creamy delight.
- Calzones and Folded Pizza: Fold dough in half over fillings and seal edges tight. Brush with olive oil before baking. Perfect for packed lunches or meals.
- Focaccia Bread: Press dough into oiled pan without stretching thin. Dimple surface with fingers. Top with olive oil, rosemary, and sea salt before baking.
- Pizza Rolls: Roll out dough into rectangle shape. Add toppings and roll up tight like cinnamon rolls. Slice and bake for shareable appetizers.
- Flatbread Sandwiches: Bake dough plain without toppings first. Split horizontally when cool. Fill with sandwich ingredients for Mediterranean-style lunch wraps or sandwiches.
Topping Tips for This Dough
This dough works beautifully with any toppings you love. Keep your sauce layer thin so the crust stays crispy.
Too much sauce makes everything soggy and heavy. Use fresh mozzarella torn into small pieces instead of shredded cheese.
Fresh mozzarella melts better and tastes more authentic. Add your cheese in small amounts spread evenly across the pizza.
Leave the outer edge bare for a classic puffy crust. Put watery vegetables like mushrooms or tomatoes in thin slices.
Pat them dry with paper towels before adding them to your pizza. Save delicate toppings like fresh basil or arugula for after baking.
Storage, Make-Ahead and Freezing Tips
Refrigerator Storage : After you make your dough balls, put them in separate containers. Rub a little olive oil on each ball to stop a skin from forming. Close the lids tight.
You can keep them in the fridge for 3 to 5 days. The dough gets more flavor on day 3 or 4. When you want to cook, take the dough out 1 to 2 hours before you stretch it.
Poolish Storage : You can make the poolish ahead of time. It is best to use it between 16 and 20 hours after you make it.
You can go up to 24 hours. After that, it might be too sour and overripe.
Freezing Pizza Dough : You can freeze these dough balls. Do it right after you shape them, before the final proof.
Put each ball in its own freezer bag. Squeeze out all the air. Write the date on the bag. They stay good for up to 3 months.
To thaw, put a bag in the fridge 24 hours before you want pizza. Then take it out of the fridge 1 to 2 hours before you cook to let it warm up.
Vito Iacopelli Pizza Dough Recipe FAQs
1. Is it better to let the dough rest in the fridge or on the counter?
Both are needed. The long, cold rest in the fridge (after making the poolish) is for flavor.
The final rest on the counter (after making the dough ball) is to wake the dough up and make it soft and easy to stretch. You need both steps for the best result.
2. Can I bake same day?
Yes, skip long fridge. Use warmer water, room proof 2-4 hours till double. Less flavor depth but works.
Poolish still 16 hours or cut to 4 hours with more yeast. Oven 500°F+ stone preheats key for rise. Good starter option.
3. Vegan or gluten-free?
Vegan yes, no change. Gluten-free no—needs special flours blends. Poolish not adapt well. Stick original for Neapolitan true. Dairy-free toppings easy.
4. How do I know when dough is ready to use?
After cold ferment, it doubles a bit. Balls feel soft and puffy. Press gently—should spring back slow. If over-proofed, it deflates easy.
Smell sweet, not boozy. Warm 1–2 hours before stretch for best handling.
5. Is honey necessary in poolish?
It feeds yeast fast at start. Helps in cold ferment. Small amount—no sweet taste. Skip or use sugar if no honey. Yeast activates well either way.
6. How thin should I stretch the dough?
You want the middle of the dough to be very thin, almost see-through in some spots. The edges, or the cornicione, should stay thick and puffy.
When you stretch it, work from the center outwards and push the air bubbles toward the edge.
7. Can I cook this pizza in a regular home oven?
Yes, you can. You will need a pizza stone or a baking steel. Preheat your oven as high as it will go, usually 500°F or 550°F, for at least 45 minutes. Put the stone or steel on the top rack.

Vito Iacopelli Pizza Dough Recipe
Vito Iacopelli Pizza Dough recipe made with poolish and double fermentation for airy crust, crisp texture, and authentic Neapolitan flavor at home.
Ingredients
Poolish Starter
- 00 Flour — 100 g (¾ cup)
- Cold Water — 100 ml (⅓ + 1 tbsp cup)
- Dry Yeast — 2 g (½ tsp)
- Honey — 1–2 g (¼ tsp)
Final Dough
- 00 Flour — 500 g (3½ cups)
- Cold Water — 300 ml (1¼ cups)
- Salt — 10 g (2 tsp)
- Olive Oil — 15 ml (1 tbsp)
For Handling
- Dusting Flour — 50 g (⅓ cup)
Instructions
- Get a small bowl. Put in 100 grams of cold water. Add 2 grams of dry yeast. Stir it with your finger until the yeast melts. Add a tiny drizzle of honey (about 1–2 grams). Mix it again. Now add 100 grams of 00 flour. Mix with a spoon for a few minutes until it is all combined. It will look like a thick paste. Cover the bowl with plastic wrap. Let it sit on the counter for one hour. Then put it in the fridge. Let it rest there for 16 to 24 hours.
- Take the poolish out of the fridge. In a large mixing bowl, pour in the cold water. Add the salt and stir until fully dissolved. This protects the yeast. Add all of the poolish into the salted water. Use a spoon or your hands to break it up and mix well. The mixture will look cloudy and thick.
- Add all the flour to the bowl at once. Mix with a wooden spoon first. When it starts to come together, switch to your hands. Knead gently inside the bowl until no dry flour is visible. The dough will feel sticky and rough. This is normal.
- Turn the dough out onto a clean counter. Do not add flour yet. Press the dough flat with your palms. Fold it over itself, turn it, and repeat. Keep doing this for about 5 minutes. The dough will slowly become smoother and less sticky. If it sticks badly, add just a tiny sprinkle of flour.
- Cover the dough with a bowl or damp towel. Let it rest for 15 minutes at room temperature. This helps the gluten relax and makes the dough easier to shape.
- Lightly oil your hands with olive oil. Pick up the dough and pull the edges underneath while rotating it. Keep doing this until you form a smooth, tight ball. The top should look smooth and the bottom should be sealed.
- Cut the dough into equal pieces. For 12-inch pizzas, use 280 grams per ball. Shape each piece into a tight ball using the same pulling and rotating motion. Create surface tension by gently dragging the dough against the counter.
- Lightly oil your containers. Place each dough ball inside. Brush a thin layer of olive oil over the top of each ball. Cover with lids or plastic wrap to prevent drying.
- Let the dough balls rest at room temperature for 1–2 hours. They should nearly double in size. When ready, the dough will feel soft, airy, and elastic. Now your pizza dough is ready to stretch, top, and bake.
Nutrition Information:
Serving Size: (Per 1 dough ball / 1 pizza base — no toppings)Amount Per Serving: Calories: 520Total Fat: 4.5gSaturated Fat: .7gUnsaturated Fat: 3.5gSodium: 980mgCarbohydrates: 102gFiber: 3gSugar: .8gProtein: 14g
The Vito Iacopelli Pizza Dough Recipe brings soft texture, crisp bite, and strong structure in every bake. It fits any time you want perfect pizza.
This method truly honors pizza lovers who value real craft, patience, and beautiful crust results.