Buttered corn is a classic side dish that can easily steal attention from the main course. I love how a simple bowl of corn can become the part everyone talks about.
Texas Roadhouse is known for filling meals and memorable side dishes, and their buttered corn is one of my favorites.
The sweet corn kernels, smooth butter coating, and tender texture create a comforting homemade taste. This Texas Roadhouse Buttered Corn Recipe brings that same feeling to my home with simple ingredients.
I wanted to recreate this side after enjoying the original version. I spent time finding the right balance of sweetness, buttery flavor, and seasoning.
This homemade recipe uses everyday ingredients and is quick to prepare, so I can serve a warm and flavorful side anytime.
What Type of Corn Works Best for This Recipe
Fresh or frozen corn works great for this recipe, but canned sweet corn is easiest and fastest. Corn is the main ingredient here, so picking the right kind is very important.
Choose corn that looks bright yellow with plump kernels. The kernels should feel firm and smooth, not soft or shriveled.
Frozen corn works just as well as fresh and stays sweet. Stay away from corn that looks dried out or pale in color.
Drain any liquid from canned or frozen corn before cooking to keep the butter from becoming watery. Good corn helps this dish taste like the real Texas Roadhouse version.
What Ingredients Are Used in Texas Roadhouse Buttered Corn
Core Ingredients:
- Corn – One 15-ounce can of sweet corn (drained) or 2 cups of frozen corn (thawed and drained). Fresh corn kernels (about 3 cups) work great too. All three options taste good and cook the same way in this recipe.
- Butter – 4 tablespoons (or ½ stick) of unsalted butter makes the perfect coating. This amount is generous enough to flavor all the corn without making it too greasy. For extra richness, add 1 more tablespoon. Ghee (clarified butter) can replace regular butter and adds a nutty taste.
- Salt – ½ teaspoon of salt brings out the corn’s natural sweetness. Add more or less based on how you like it. Sea salt or kosher salt both work fine here.
Flavor & Toppings:
- Garlic Powder – ¼ teaspoon of garlic powder adds a savory kick. This ingredient brings depth to the simple corn and butter. Skip it if garlic is not your favorite, or use 1 clove of fresh minced garlic instead.
- Chili Powder – ¼ teaspoon of chili powder gives a light spicy flavor. This amount is mild and not too hot. Use paprika if you prefer less heat, or leave it out entirely.
- Paprika Powder – ¼ teaspoon of paprika adds color and a mild pepper flavor. Smoked paprika works well too and adds extra depth. Omit it for a plainer version.
- Grated Cheese – ¼ cup of shredded cheddar cheese (or any melting cheese) makes the corn creamier and more flavorful. Parmesan, Monterey Jack, or mozzarella are great alternatives. Skip the cheese to keep the dish simple.
- Chives or Parsley – 2 tablespoons of fresh chives or parsley add a fresh finishing touch. Chopped scallions can be used instead of chives. These herbs add color and a fresh flavor to the dish.
Kitchen Equipment Needed
- Frying Pan – Medium-sized, 10 to 12 inches wide
- Wooden Spoon – For stirring corn gently
- Colander – To drain the canned corn well
- Measuring Cups – For accurate ingredient amounts
- Measuring Spoons – For small seasoning portions
- Box Grater – To shred cheese fresh
- Cutting Board – For chopping fresh herbs
- Sharp Knife – To chop chives or parsley finely
How to Make Texas Roadhouse Buttered Corn at Home
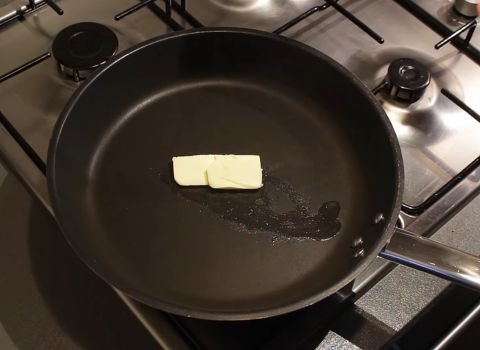
Step 1 | Melt the Butter
Place a medium frying pan on the stove and turn the heat to medium-high. Add 4 tablespoons of butter to the pan.
Watch it closely as it melts. Once it’s fully melted and just starting to bubble, move to the next step. Do not let it brown.
Step 2 | Prepare the Corn
While the butter is melting, open your can of sweet corn (or use frozen corn). Pour the corn into a colander and drain all the liquid away.
Make sure it’s very dry so the corn doesn’t get watery. If using fresh corn, you can skip this step.
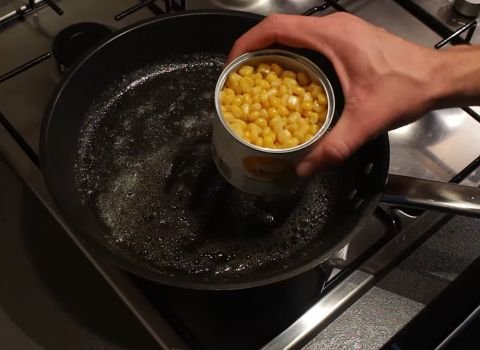
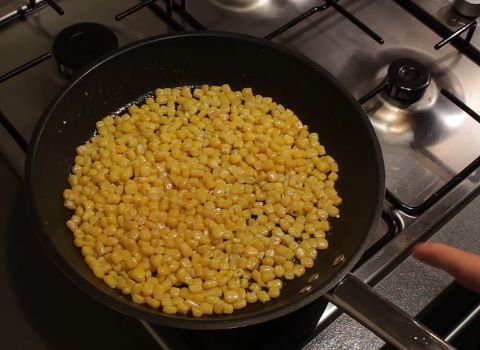
Step 3 | Add the Corn to the Pan
Pour the drained corn into the melted butter. Use your wooden spoon to stir everything together. Make sure every kernel gets coated with butter.
This step takes about 1 to 2 minutes. The corn will start to smell amazing.
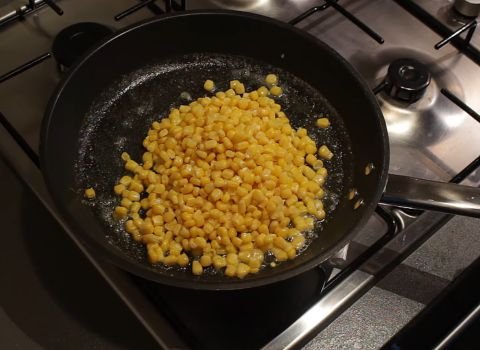
Step 4 | Cook the Corn
Let the corn cook in the butter for 1 to 2 minutes. Stir it every few seconds so it heats evenly and doesn’t stick.
If it looks too dry, add a tiny bit more butter. The corn should look shiny and golden.
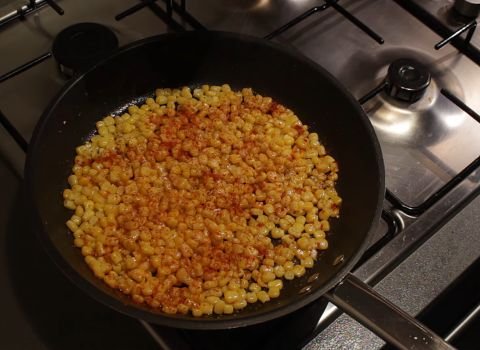
Step 5 | Add the Seasonings
Sprinkle in ½ teaspoon of salt, ¼ teaspoon of garlic powder, ¼ teaspoon of chili powder, and ¼ teaspoon of paprika powder.
Stir everything together really well so the spices mix into all the corn. Taste a kernel to see if it needs more salt.
Step 6 | Lower the Heat
Turn the heat down to medium or medium-low. This keeps the corn warm without cooking it too much. Keep the pan on the heat for about 1 more minute.
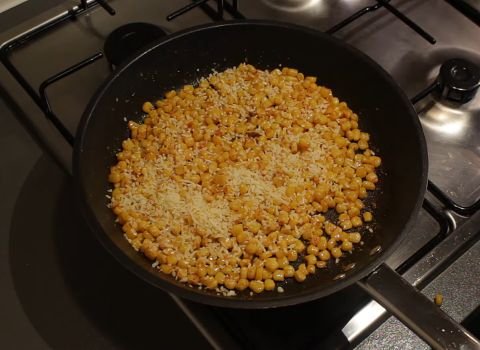
Step 7 | Add Cheese and Herbs
Sprinkle ¼ cup of grated cheese over the corn. Add 2 tablespoons of chopped chives or parsley. Stir everything together so the cheese starts to melt and the herbs spread throughout.
Step 8 | Turn Off Heat and Serve
Turn off the stove and give the corn one final good stir. Everything should be warm and well mixed. Pour the corn into a serving bowl and enjoy it right away. It tastes best when it’s hot.

Different Cooking Process
Slow Cooker Version – Add drained corn, butter, salt, and seasonings to your slow cooker. Cook on low for 1 to 2 hours or on high for 30 to 45 minutes.
Add cheese and fresh herbs in the last 10 minutes of cooking. Stir well before serving. The corn stays warm and creamy this way.
Air Fryer Version – Mix drained corn, melted butter, salt, and spices in an air fryer-safe dish. Preheat the air fryer to 350°F. Cook for 5 to 7 minutes, shaking the basket halfway through. Add cheese and herbs, then cook for 1 more minute until cheese melts.
Expert Tips & Common Mistakes to Avoid
- Cook Corn Slowly – Avoid using high heat while cooking the corn. Medium heat helps the butter and spices blend together without burning or changing the flavor.
- Add Cheese at the End – Add cheese after lowering the heat so it melts smoothly. Putting it in too early can cause clumps and make the texture uneven.
- Adjust Spices Carefully – Start with a small amount of chili powder and seasonings. More can be added later, but too much spice can hide the sweet corn flavor.
What Dishes Pair Well with Buttered Corn
Serving the right dishes with buttered corn helps create a balanced meal. I like pairing it with simple foods that match the sweet, buttery flavor and add different textures to the plate.
Here are some of my favorite serving ideas:
- Grilled Steak: Grilled steak is a classic choice with buttered corn. The smoky, juicy flavor of the steak pairs well with the sweet corn and creates a meal that feels like a steakhouse dinner.
- Baked Potato: A warm baked potato works well with buttered corn. Soft potato texture and creamy toppings go nicely with the sweet, buttery corn for a filling combination.
- Grilled Chicken: Grilled chicken is a light option that fits well with buttered corn. Its mild seasoning allows the corn’s flavor to come through while keeping the meal simple.
- Dinner Rolls: Soft dinner rolls pair nicely with buttered corn. They soak up extra butter and add a warm, homemade feel to the plate.
- Fresh Garden Salad: A fresh garden salad brings a crisp contrast to buttered corn. The vegetables keep the meal balanced while adding a lighter bite.
Storage, Freezing, and Reheating Process
This buttered corn stores very well, making leftovers easy to keep for later use. Allow the corn to cool completely before placing it in storage. Transfer it into an airtight container and keep it in the refrigerator. It stays fresh for 3 to 4 days.
For longer storage, freezing works best. Spread the cooled corn on a baking sheet in a single layer. Freeze for about 2 hours until firm. Then move it into a freezer-safe bag or container. It can stay in the freezer for up to 3 months.
To reheat, warm the corn slowly in a skillet over low heat. Add a small amount of butter to keep the texture soft and moist. A microwave can also be used. Heat for 1 to 2 minutes and stir halfway through for even warming.
High heat should be avoided because it can dry out the kernels and reduce flavor.
To prevent dryness, store leftovers with a small layer of butter on top or add butter during reheating for better moisture and taste.
Texas Roadhouse Buttered Corn FAQs
1. Can I make Texas Roadhouse Buttered Corn ahead of time?
Yes, you can prepare this dish 1 to 2 hours before serving. Make it, let it cool, then cover and refrigerate. Reheat gently in a pan with a little extra butter right before serving.
This works great for parties or busy weeknights when you need to plan meals ahead.
2. Is Texas Roadhouse Buttered Corn gluten-free?
Yes, this recipe is naturally gluten-free since it contains only corn, butter, seasonings, cheese, and herbs. All these ingredients are naturally free from gluten, making it safe for people following a gluten-free diet.
3. Can I make this recipe spicy?
Yes. Add ¼ teaspoon cayenne pepper, extra chili powder, diced jalapeños, or a few drops of hot sauce. Start with a small amount and adjust the heat level as desired.
4. How to keep corn kernels from sticking to the pan?
Use a medium nonstick pan, keep heat moderate, stir often, and add enough butter or oil to coat kernels.

Texas Roadhouse Buttered Corn Recipe
Copycat Texas Roadhouse Buttered Corn Recipe ready in 10 minutes! Creamy, golden corn with butter, garlic, and spices for perfect restaurant-style side.
Ingredients
- Sweet corn – 1 can (15 oz) drained or 2 cups frozen corn (thawed and drained) or 3 cups fresh corn kernels
- Unsalted butter – 4 tablespoons (½ stick)
- Salt – ½ teaspoon
- Garlic powder – ¼ teaspoon
- Chili powder – ¼ teaspoon
- Paprika – ¼ teaspoon
- Grated cheddar cheese – ¼ cup (optional)
- Fresh chives or parsley – 2 tablespoons, chopped
Instructions
- Place a medium frying pan on the stove over medium-high heat. Add 4 tablespoons of butter and let it melt completely. Watch closely so it doesn’t brown - once it’s fully melted and just starting to bubble, move on.
- While the butter melts, drain your canned or thawed frozen corn thoroughly using a colander. Press lightly to remove extra moisture so the corn doesn’t turn watery. Fresh corn can be used directly without draining.
- Pour the corn into the melted butter. Stir well using a wooden spoon so every kernel gets evenly coated. Cook for about 1–2 minutes until the corn is heated through and lightly glossy.
- Continue cooking for another 1–2 minutes, stirring occasionally to prevent sticking. Add salt, garlic powder, chili powder, and paprika. Mix well so the seasoning spreads evenly, then taste and adjust salt if needed.
- Reduce the heat to medium or medium-low to keep the corn warm without overcooking. Let it sit on the heat for about 1 minute so the flavors blend nicely.
- Sprinkle grated cheese over the hot corn along with chopped chives or parsley. Stir gently until the cheese begins to melt and coat the corn, giving it a rich, creamy finish.
- Turn off the heat and give everything a final stir. Transfer to a serving bowl and serve immediately while warm and buttery for the best flavor.
Nutrition Information:
Serving Size: (Per Serving – Approximate)Amount Per Serving: Calories: 190Cholesterol: 30mgSodium: 300mgCarbohydrates: 13gFiber: 5gSugar: 4gProtein: 5g
This Texas Roadhouse Buttered Corn Recipe delivers restaurant-quality flavor at home with simple steps. The sweet and buttery taste matches the original closely.
Try different toppings to customize it your way and experiment today.